
A GUIDE TO CLIMB THE HAIKU STAIRS
⇷☓⇸
So, you’re in Hawaii, and want to climb the Haiku Stairs? That’s great news!
They are found in Oahu and is an incredible 10.4-mile roundtrip trail to the top, with so many different views and nature to keep you entertained for hours. Not only that but once at the top you get to experience the main reason you climbed there – the stairs! Now, for most, a 7 hour around hike to see some stairs isn’t the most appealing idea, but once you see these photos I am pretty sure you will change your mind.
The stairs themselves are government property and you will be trespassing if found on them, hence why you need to go the back route. If you try and go up the stairs you are likely to encounter angry locals, a guard or the police who are dishing out fines of $1000+ USD.
1. Where to Start
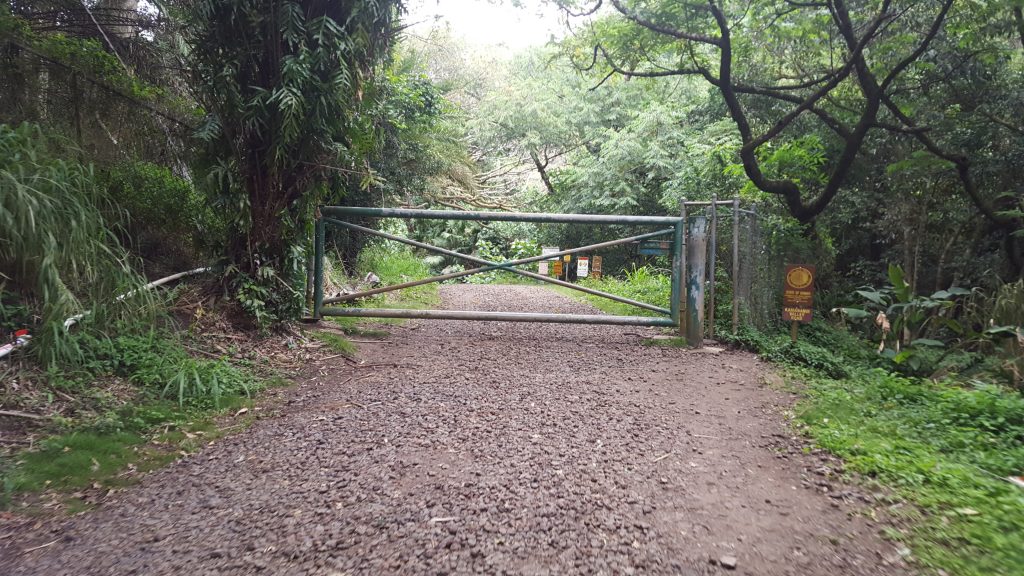
To get to the trailhead, park outside the Moanalua Valley Park and the trail begins just after the green gate.
You will drive down a residential road with speed bumps, until you come to a dead end with a car park in front of you. There are only a handful of spaces so you will need to get there early, but if not you can always park on the residential road (just look out for the signs where you cant park).
There are also toilets where I would recommend one last pit stop as these are the only toilets on the route and a disused playground. My partner and I started this trail at about 9am.
The first 2.9 miles are fairly straightforward with only 100ft of elevation each mile. The path is quite wide and at many points there are forks in the road which come back to the same point after about 20 yards or so, so don’t worry too much about going off course.
Keep going straight and be sure to count roughly 17 4×4 crossings which are essentially slabs of concrete. Remember to keep count of these! They are fairly obvious so you won’t miss them.
2. The First Turn
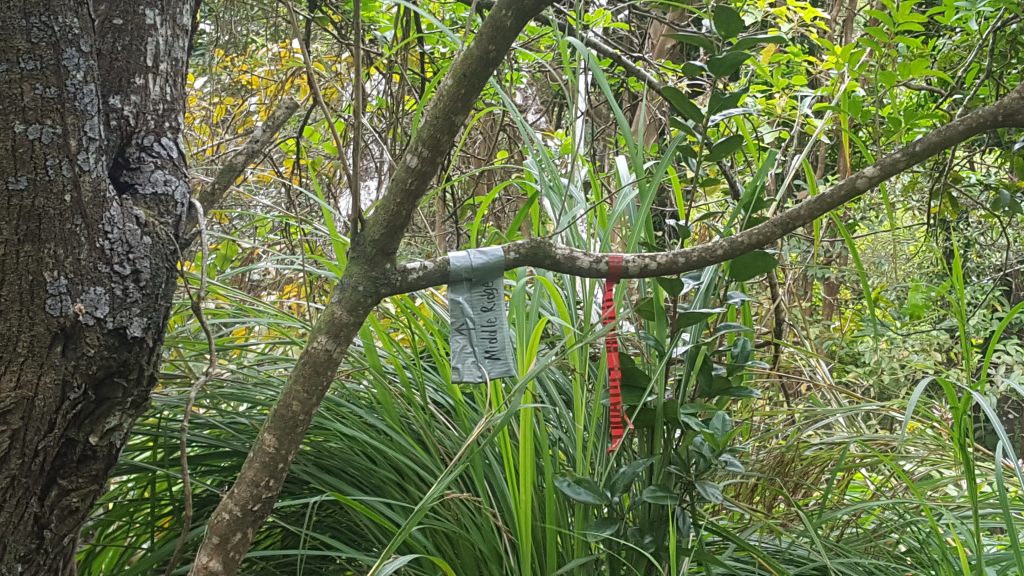
Shortly after the 17th crossing, you should see a sign for the Kulana’ahane trail (note: DO NOT take this). Instead walk another 15 feet or so and you will see a small, unsigned trail on your left hand side. Although small, you will see some pink ribbons (see above photo) tied onto a branch (if you don’t see these after a while you’ve gone too far).
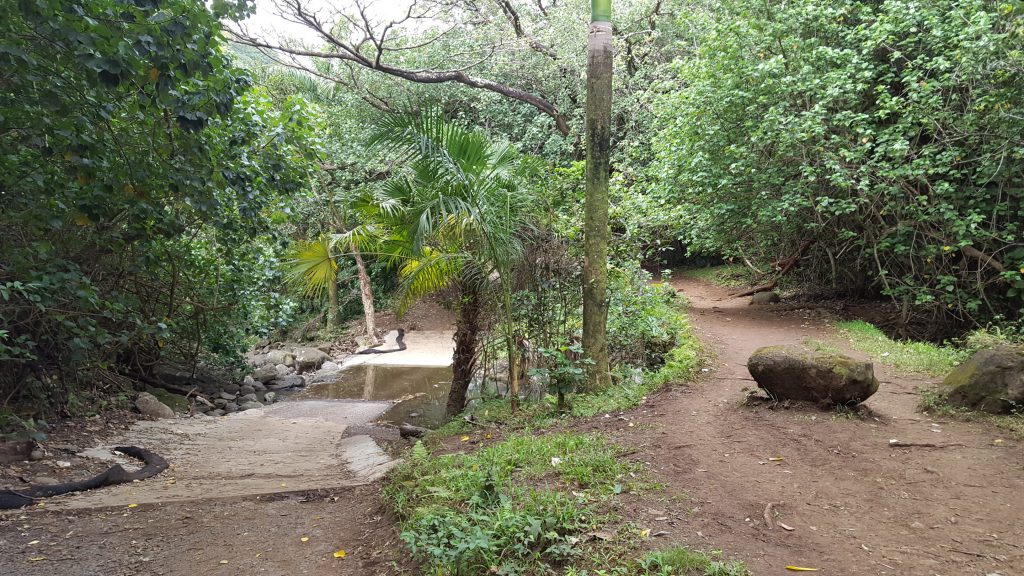
Turn left here and you will cross a stream-bed which then begins to climb quickly.
The first mile of this trail climbs 900 feet in elevation and is primarily through trees and up a steep dirt track. It is quite steep to start and be careful to watch out for roots, it will level out eventually giving you a breather.
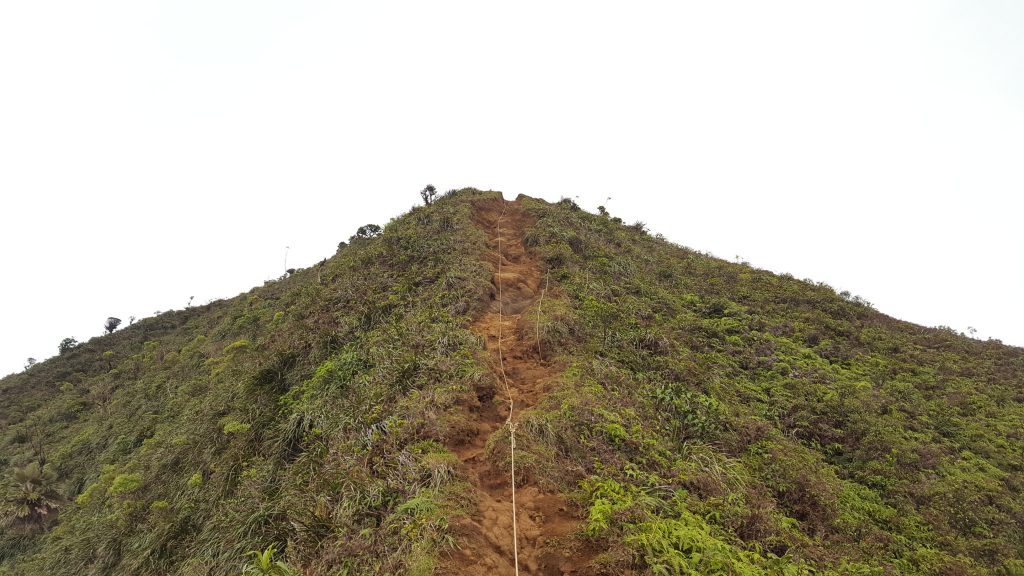
The second mile of this trail brings 1100 ft. of elevation: it is far more exposed and the trail teeters in the middle of sharp angled drop offs on either side. I was lucky enough to have climbed on a windless morning, but any wind will add to the complexity and risk to the hike. Plan accordingly and check the weather reports the day before and on the day you plan to go.
If there’s any hint of rain or strong winds then I would suggest not going as it can get a bit sketchy. You will find along some of the steeper parts of the trail there are several ropes which people have tied to help with the hike, so definitely make use of these.
3. At the Top
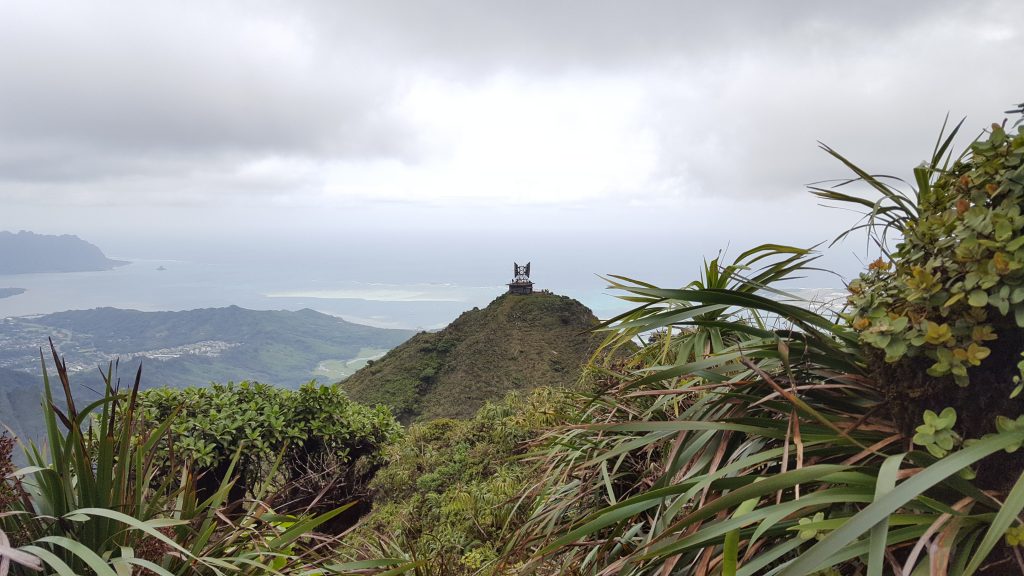
Once you have finally made it the peak you will see the Haiku Stairs Radio Tower which comes into view just in the distance. This is the end of the Middle Ridge Trail.
It honestly looks like something out of the TV show ‘LOST‘ and part of the Dharma station, which will get the adrenalin pumping and make you even more excited to reach it. However, the 20-30 minute hike to the radio tower is full of its own challenges.
4. Watch Your Step
The seemingly level elevation from point A to point B can be misleading and the giddy nature of being so close can come with a lack of focus. Be super careful. Especially because you are more exposed up there and it is far muddier and much more slippery from the weather conditions.
Additionally, there are several inclines and declines with poor footing, where you will encounter a couple more ropes, which you have to use for both getting up and then back down. Take your time, don’t be rushed by other people and watch your footing and falling rocks.
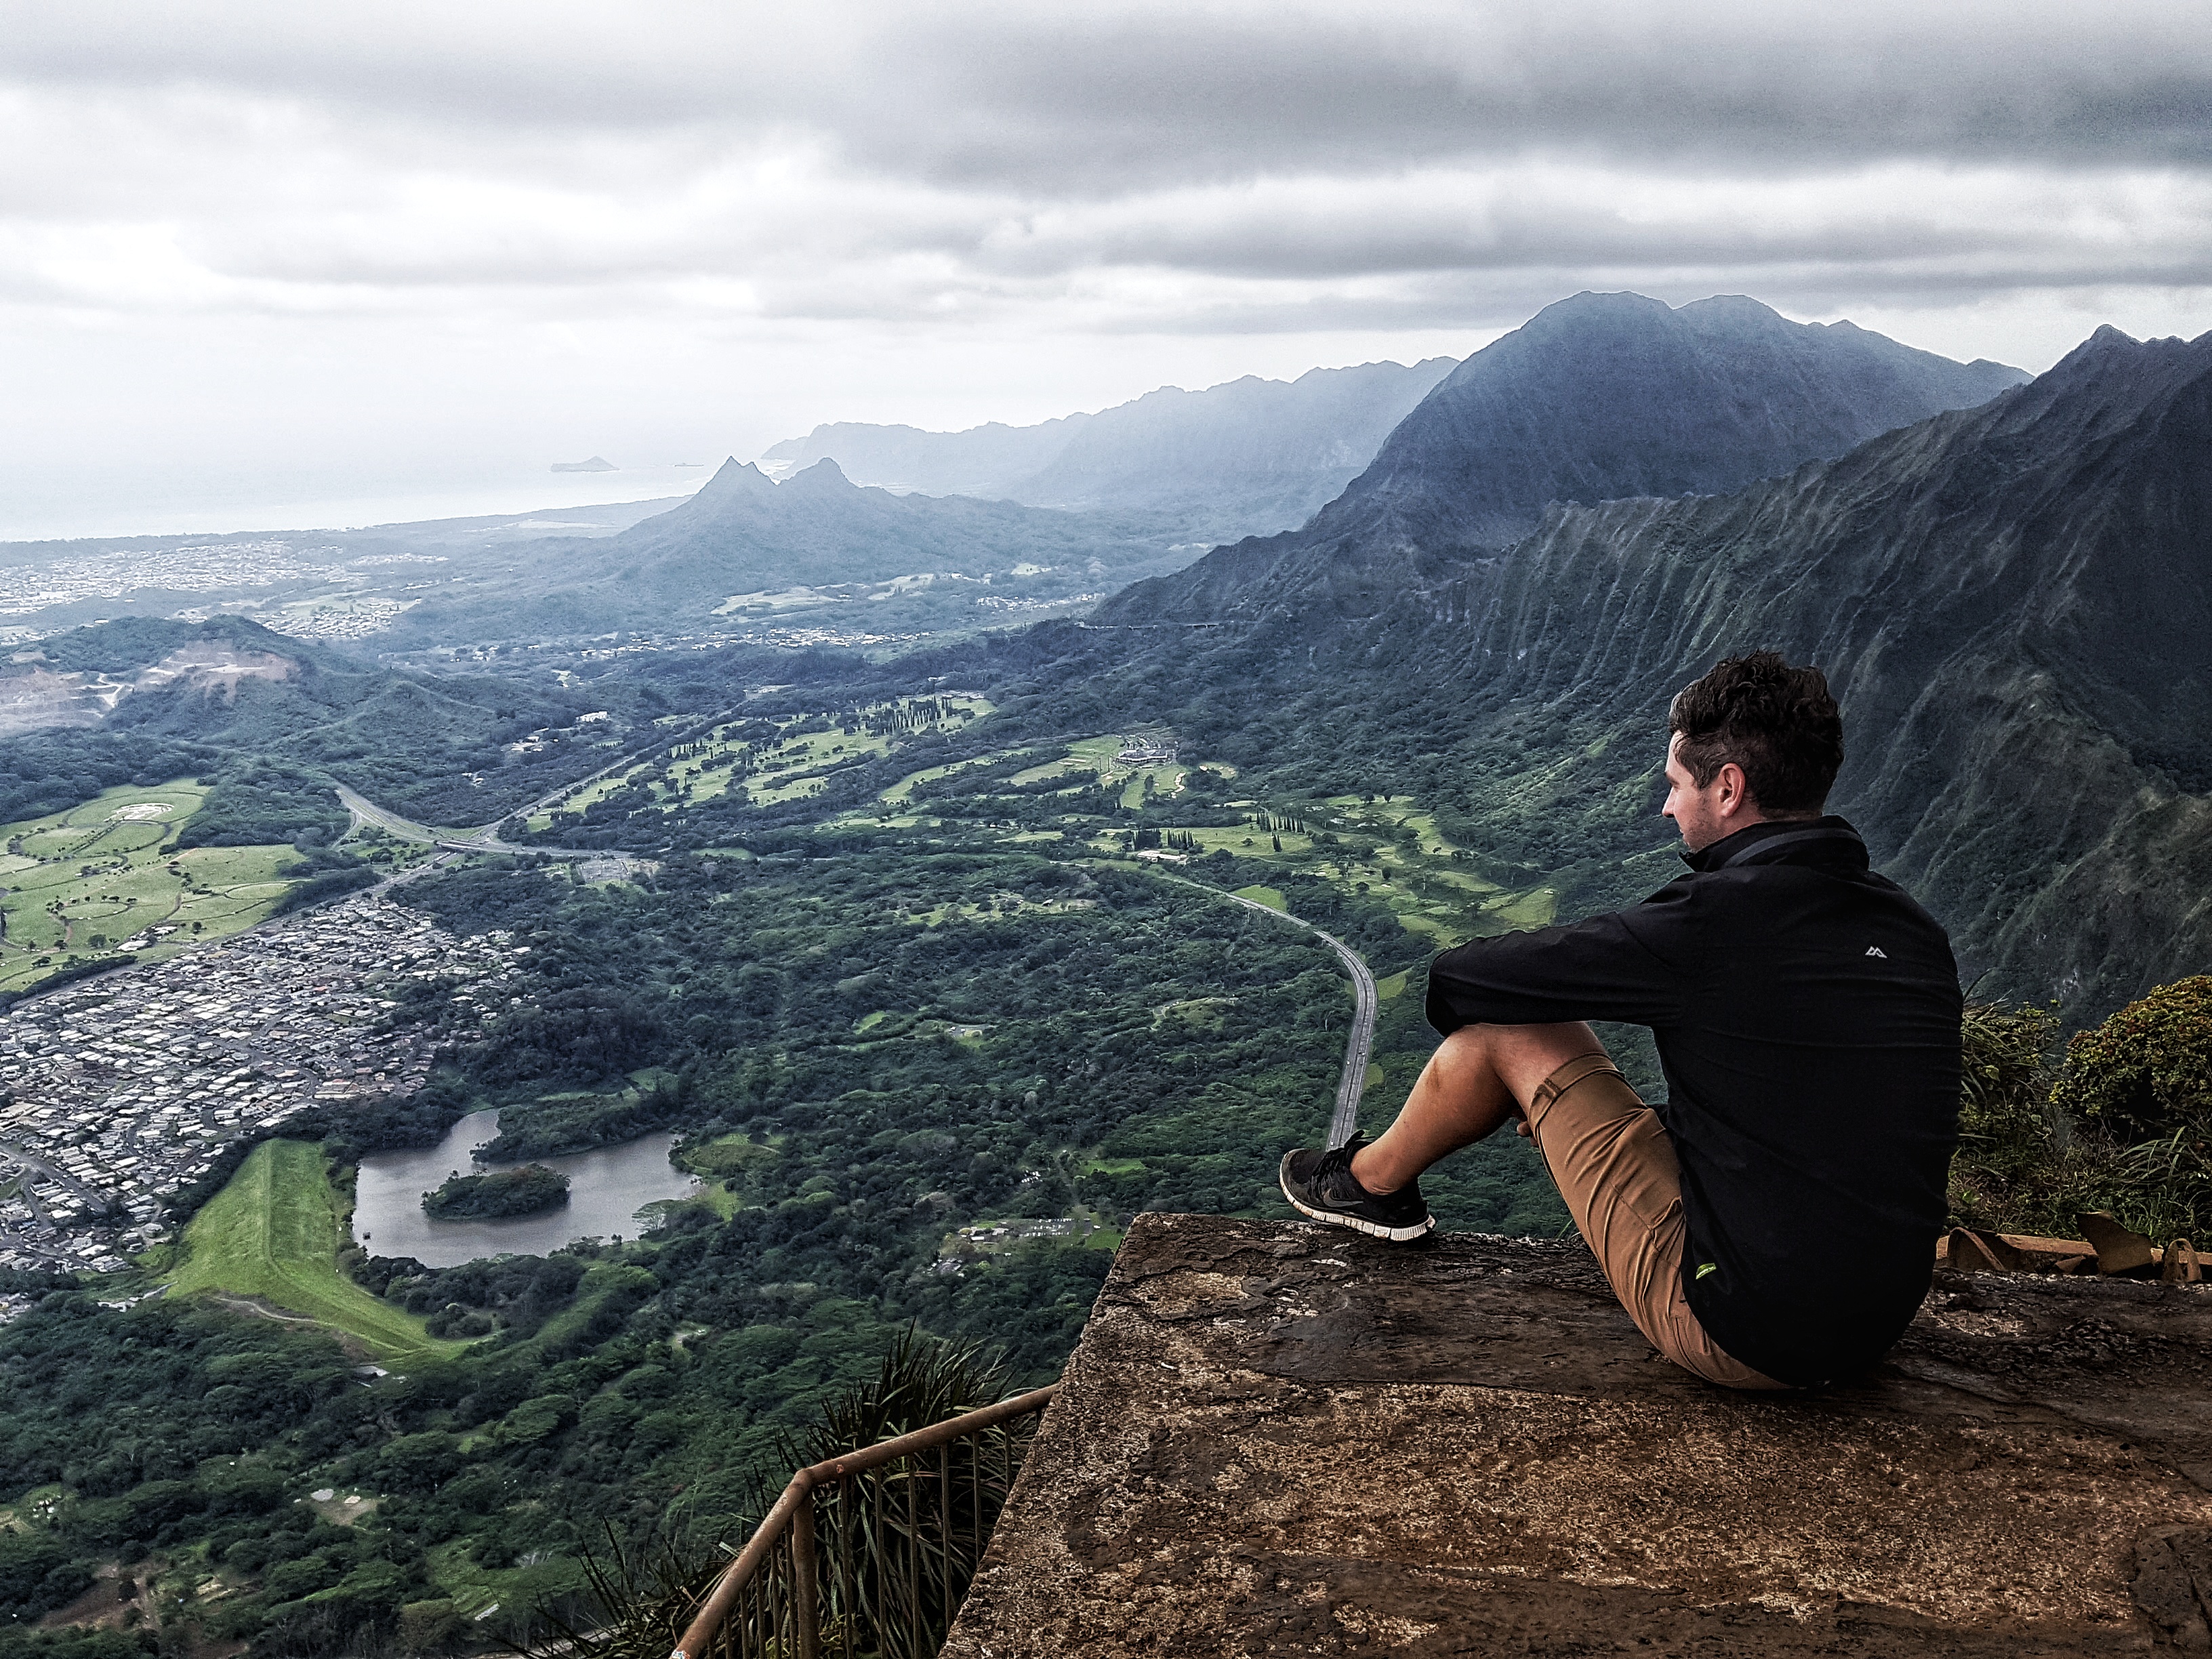
Once you have finally made it to the top of this you are about 200 yards from the radio tower and the trail gets a lot easier from here, where you are able to take in the grand views of Oahu and Waikiki. The rolling green mountains stretch out either side of you and you can make out the dual highway cutting its way through Earth below you.
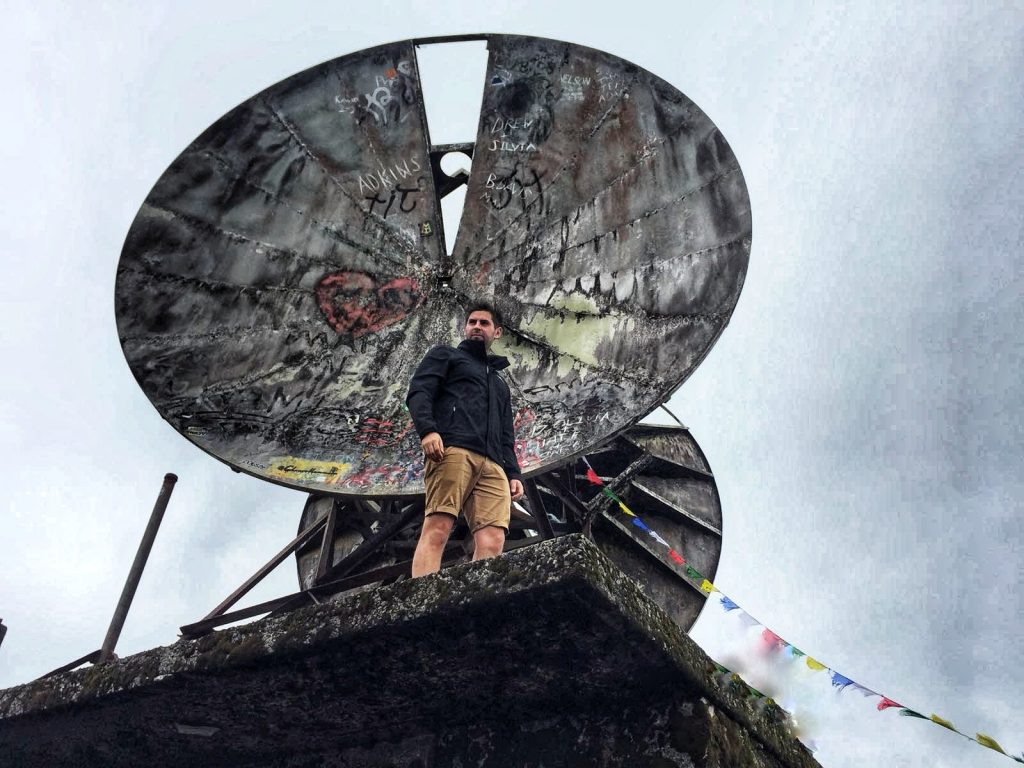
I climbed on top of the radio station to get some better views (and just to go as high as I possibly could). Then I explored the stairs to take some awesome photos and obviously, the main reason for the climb.
I went about half way down and then made my way back up the stairs to the radio station where it’s a great place to have some food, refuel and rest a little before making my way back down the trail again. Take as many photos and videos as possible, enjoy the 360 degree views and welcome to the ‘Stairway to Heaven‘.

What to take with you
- First aid kit – plasters, antiseptic cream, paracetamol etc.
- About 2-3 litres of water each (its thirsty work believe me)
- Food – Protein bars, Trail mix, Sandwiches, Chocolate, Fruit
- Good hiking boots or running trainers
- A decent waterproof and windproof coat (it gets cold at the top)
- Download Maps.Me – A good way to see your route whilst hiking
- I wore shorts, a t-shirt and my coat with running trainers
- Someone to join you on the hike. Safer in numbers.
- Let someone know where you’re going, what time you start and roughly when you will back.
If you have any questions, please leave a comment below, or email me at [email protected]